This procedure describes a configuration example of locks and communication hubs using: Mifare Classic UID user credential, override credential card (Mifare Classic UID), secure communication and DIP Switch addressing mode.
For other settings and addressing modes, refer to Aperio Online Programming Application manual, ref .
- Before configuration, check that Update device time during door configuration is activated.
Enter the Settings - Installation Settings window.
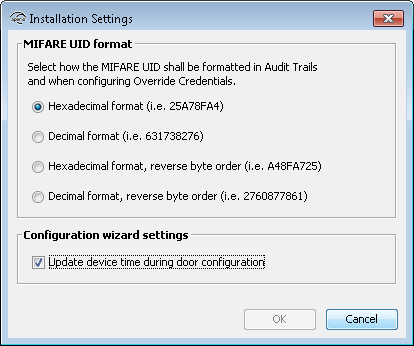
Follow the steps below to perform a default configuration of locks/sensors and communication hubs:
The changes you make during the update of the door configuration are not carried out until you perform the device update on the last page in the wizard.
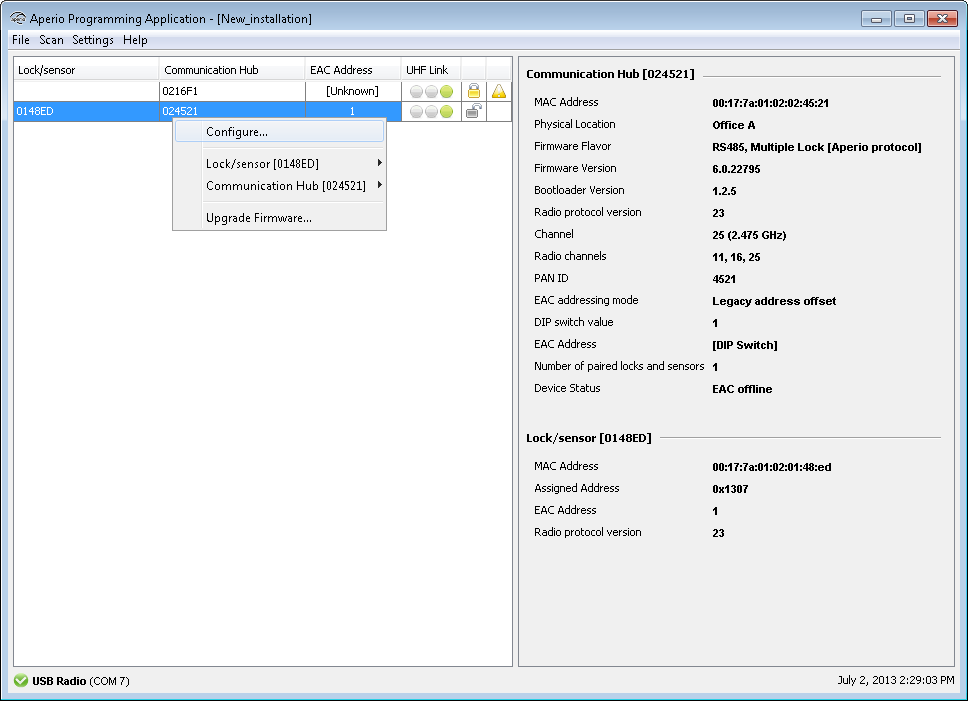
- Select a lock in the scan result table, right click and select (or if several locks are paired).
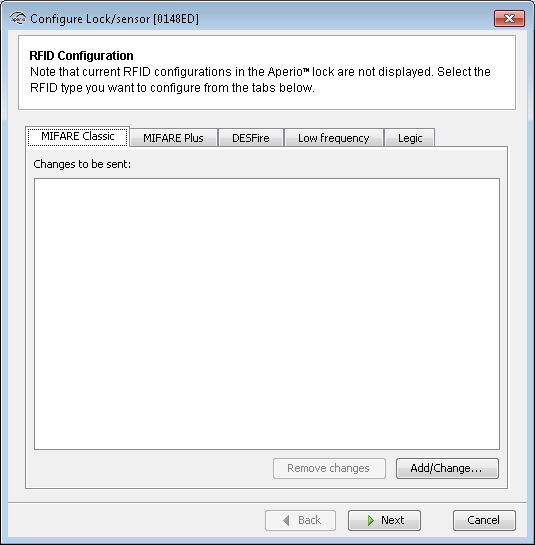
- On the RFID Configuration page, click Next without any changes.
- If advanced mode is activated the Keypad configuration page will appear. Leave without changes by clicking Next.
- On the Override Credential page it is recommended to add a credential. Select the
credential type in the drop down list and click Add and enter credential information
(in this case Mifare Classic UID). This credential can for example be used to gain access
through all doors during installation and when the EAC is offline.
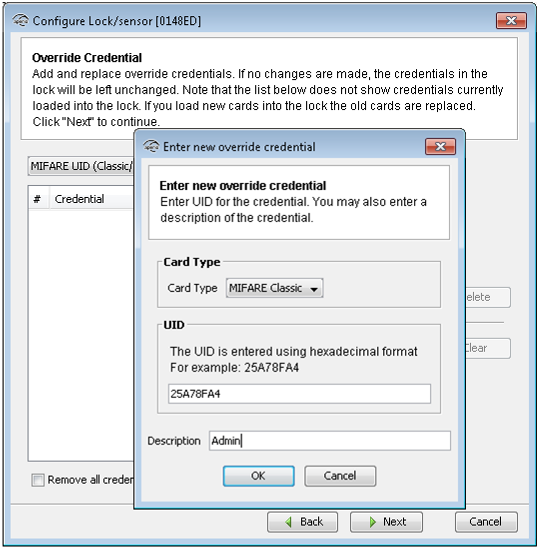
- Click OK followed by Next in the Wizard main window.
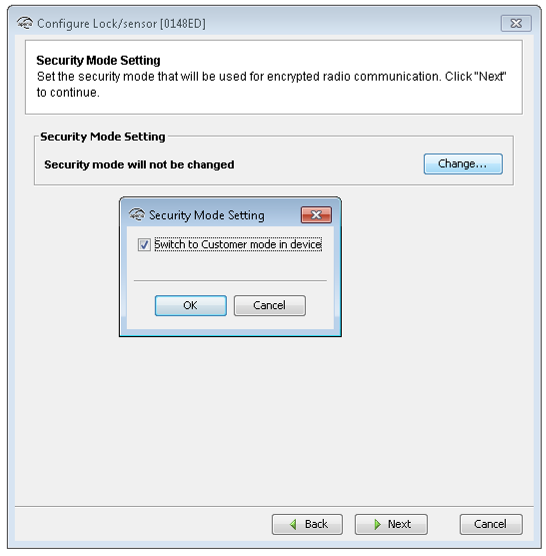
- On the Security mode Setting page, click Change to switch to Customer mode in both the
lock and communication hub, to obtain secure communication using the Encryption
key.
 Note:
Note:Proper handling of Encryption keys is essential to lock/sensor security!
If the installation and first configuration is not performed correctly by setting all locks in customer mode, the radio communication will not be secure and the locks will therefore be vulnerable to intrusion attempts.
- To enable secure communication using the encryption key, select Switch to customer mode in device, click OK and then Next in the wizard main window.
- On the Electronic Access Controller Setting page, in the Enable EAC Address via Dip Switch
field, click Change and select Enable Dip Switch.
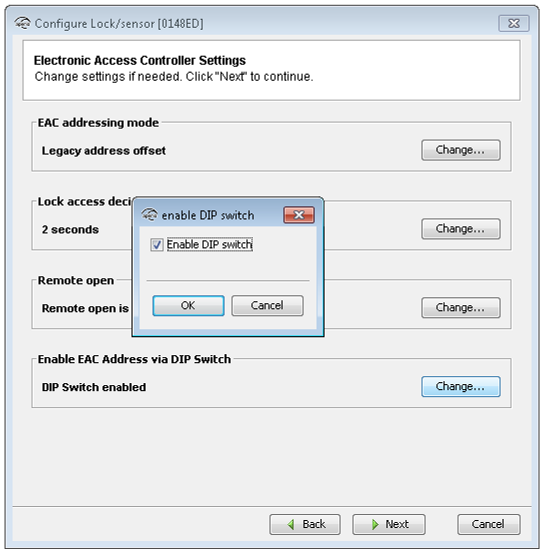
- Click OK followed by Next in the wizard main window.
- If advanced mode is activated the Advanced Settings and Advanced Lock/Sensor Settings will appear. Leave both pages without changes by clicking Next.
- On the Device Update page, check that the summary of the configuration tasks that will be
sent to the lock is correct.
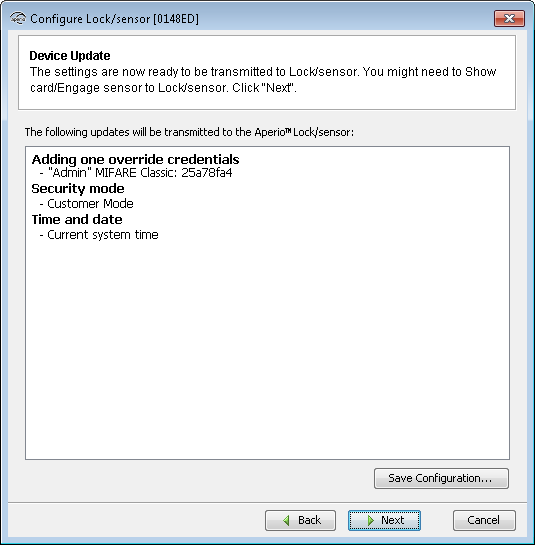
- Click Save configuration to facilitate further lock configurations (for other hubs/locks)
using the same communication hub. Enter a configuration name and click OK.
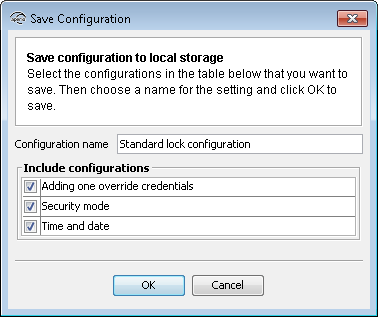
- Click Next in the wizard main window to download the configuration to the lock.
- If necessary hold the credential in front of the lock to activate the radio.
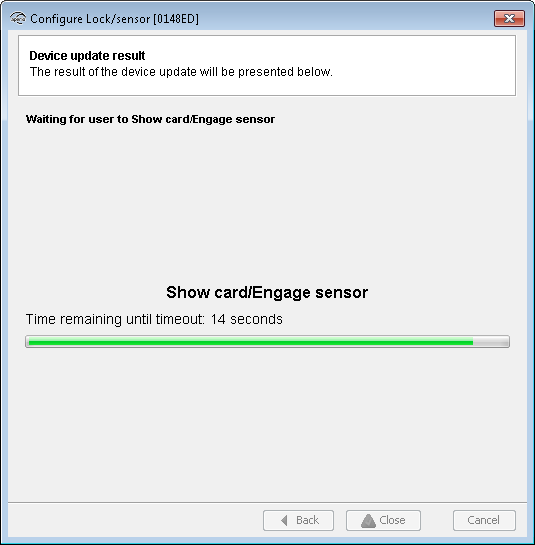
- After successful update, click Close.
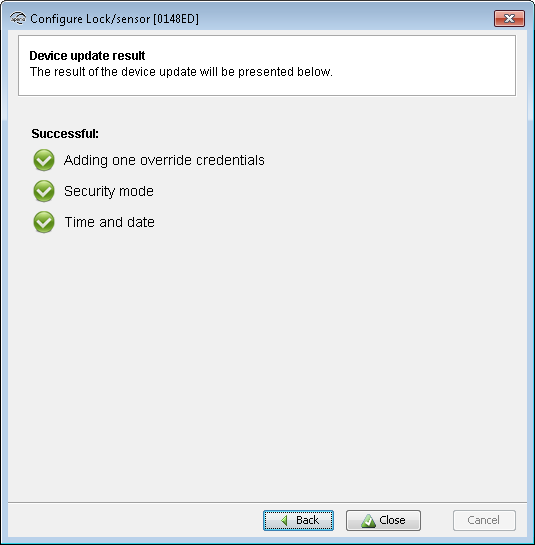
Using the wizard for a communcation hub with only one lock paired, customer mode is set both for the lock and communication hub. For communciation hubs with several locks paired a security conflict will appear.